EN
EN DE
DE Italiano
 Español
 Français
 Português
 Nederlands
 Dansk
Dansk Polski
 český
český Norge
Norge Svenska
 Türkçe
 しろうと
しろうと بالعربية
  Tiếng Việt
 한국어
한국어 Русский язык
 คนไทย
คนไทย Indonesia
Product News
How to Differentiate and Select Embedded Panels
2025-07-11
How to Differentiate and Select Embedded Panels
In industrial application scenarios, there is a wide variety of electrical boxes, control cabinets, communication devices, control units, and automated production lines.
These industrial equipments come in different sizes, shapes, functions, and protection levels. Because of these differences, the embedded panels needed for each type will be different too.
To provide a more systematic understanding, we will first introduce two commonly used embedded panel designs: front panel mount and rear panel mount types. We will compare and differentiate them from four key aspects: installation appearance, panel design, enclosure/cabinet machining requirements, and installation sequence.
For easier
illustration:
The front panel
mount example uses Wisemaker’s standard 12.1-inch embedded display.
The rear panel mount example uses Wisemaker’s customized
12.1-inch embedded display.
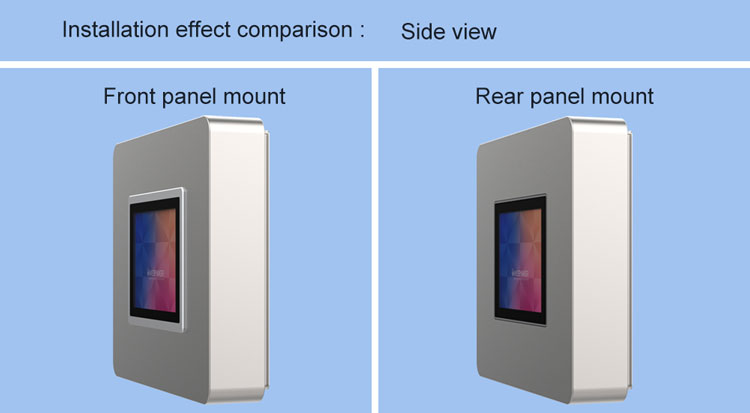
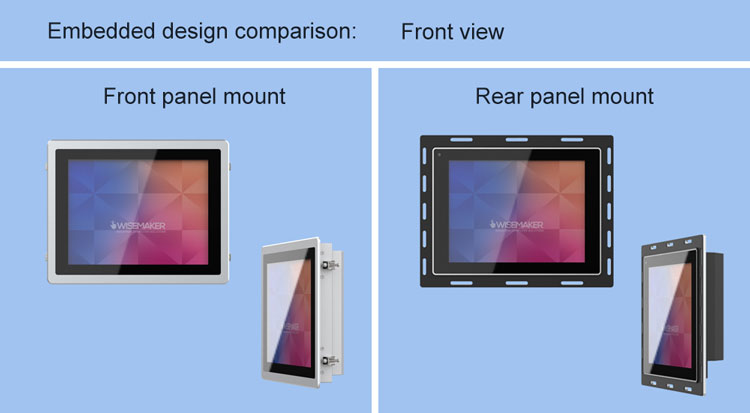
We will first compare the installation outcome of these two embedded panel types by viewing them from the front, side, and rear angles after being installed into the cabinet.
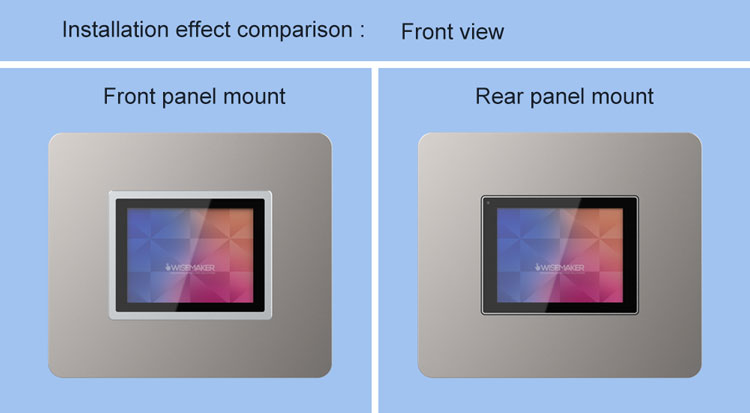
| Front panel mount | Rear panel mount | |
| Panel width | The panel is wider on all four sides | The panel is narrower on all four sides |
| Panel thickness | The panel protrudes above the cabinet surface | The panel is flush with the cabinet surface |
| Panel fixation | Fixed with mounting clip | The panel is secured to the cabinet using nuts |
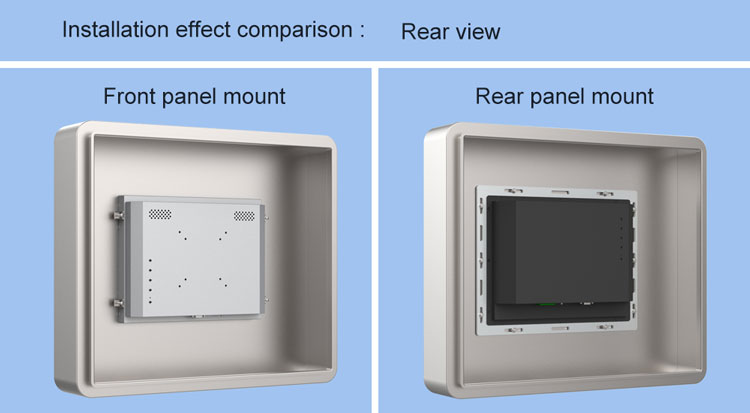
Next, we compare the panel designs of the two embedded displays from the front and rear angles.
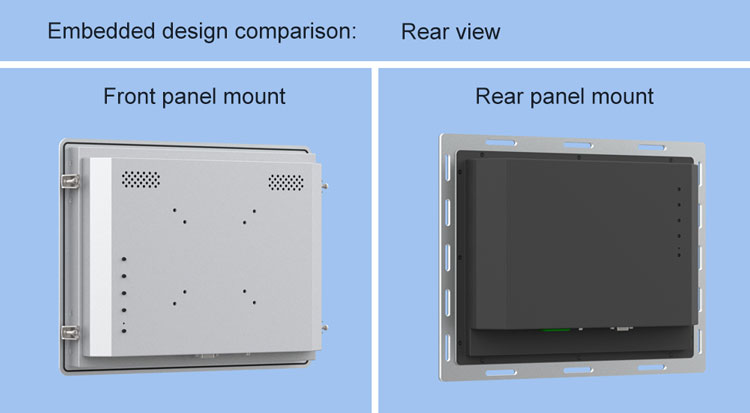
| Front panel mount | Rear panel mount | |
| Panel | The panel is flat with no reserved holes | Mounting holes are reserved on the panel step |
| Fixing | There are clip holes on the middle cover of the embedded panel | No reserved holes on the middle cover of the embedded panel |
Next, let’s look at the differences in enclosure/cabinet requirements for the two embedded panel types.
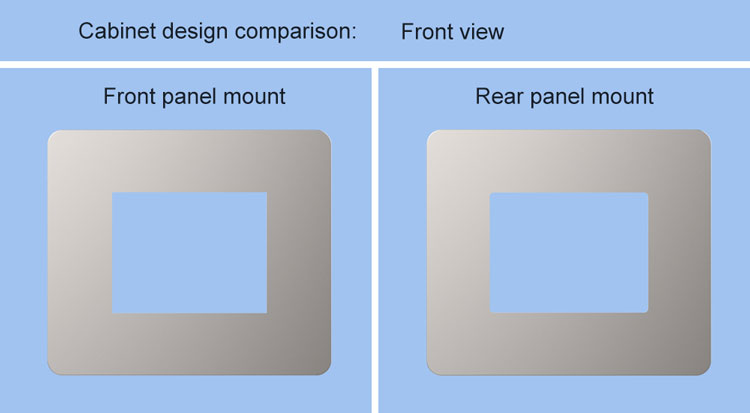
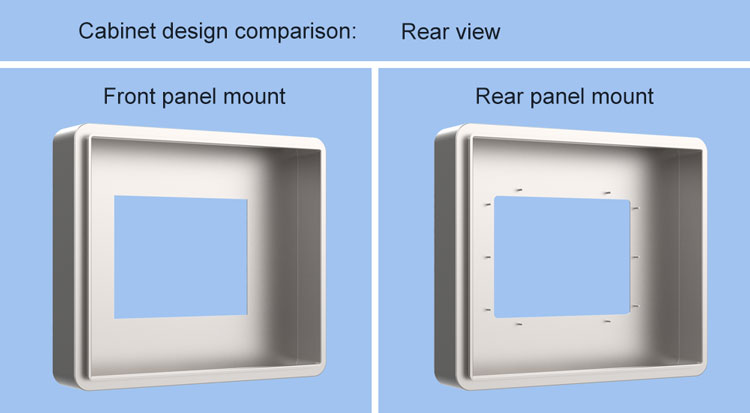
| Front panel mount | Rear panel mount | |
| Front view | Reserve openings according to the reference dimensions | Cut openings according to the reference dimensions |
| Rear view | No requirements | Make the necessary threaded posts for fixing |
Finally, the installation sequences of the two embedded panels are different.
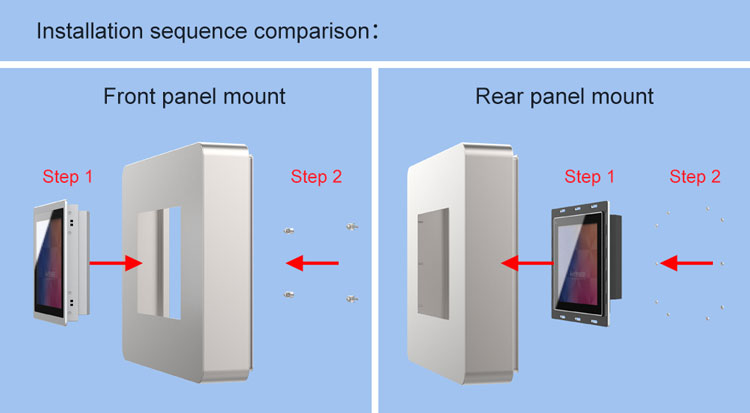
| Front panel mount | Rear panel mount | |
| Step 1 | The embedded panel is inserted from the front of the enclosure/cabinet into the reserved opening | The embedded panel is inserted into the reserved opening from the back of the enclosure/cabinet. |
| Step 2 | At the back of the enclosure/cabinet, it is secured by tightening with clip brackets. | At the back of the enclosure/cabinet, the panel is fastened with nuts |
From the four aspects above, we can see the differences between the two commonly used embedded panels. Sealing gaskets can be added according to different protection levels to meet the required protection standards.
How should customers choose an embedded panel?
They can consider three aspects:
1. Enclosure/cabinet size
2. Enclosure/cabinet shape
3. Installation space
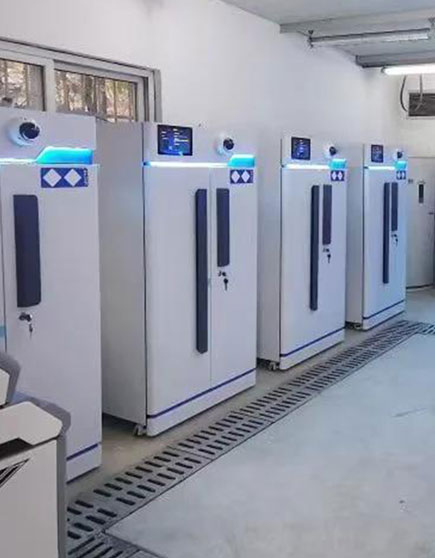
Case 1: Smart Medicine Cabinet
The overall design of the medicine cabinet is simple, with a small reserved size for the embedded panel and sufficient installation space. Therefore, the customer chose the rear panel mount.
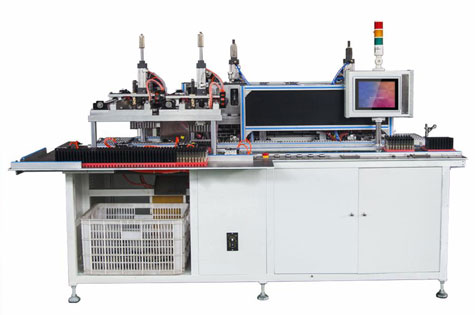
Case 2: Automated Production Line
This automated production line uses a standard control box, which is installed separately on the production line’s workbench. Since the control box does not have reserved mounting studs, and to facilitate installation while highlighting the embedded panel, the customer chose the front panel mount.